How to Configure Thinfinity VirtualUI v3.x
Start the Thinfinity VirtualUI Server Manager program to configure the settings.
There are 8 Tabs on the main screen:
General
Sessions
Authentication
Applications
Folders
Protection
Services
License
General Tab
Go to the General Tab. Ensure the settings are as follows:
Type = HTTP
Hostname = *
Port = 6580
IP Address = *
Check "Enable external access in Windows Firewall"
Uncheck "Remove Server response header"
These are all default settings.

Note
The Network ID is set automatically. Leave this as the default setting.
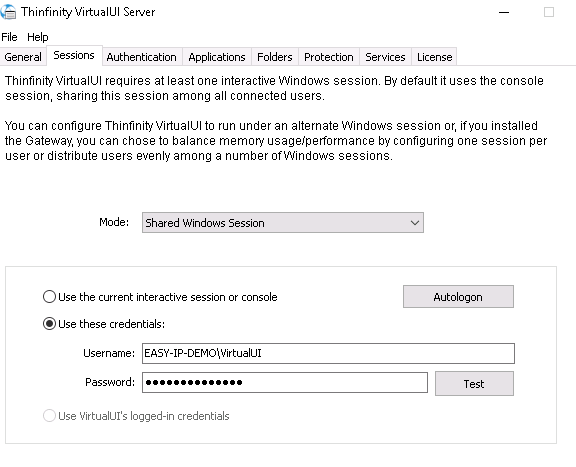
Sessions Tab
Go to the Sessions Tab. Follow the steps below:
Mode: Shared WIndows Session
Check the button marked "Use these credentials"
Enter a Windows Username and Password.
Click "Test" to verify that the username and password are correct.
Notes
Default Server account is ServerName\VirtualUI
e.g. Easy-IP-Demo\VirtualUI
We recommend you create a dedicated Windows User account for ThinfinityUI, with full Windows Administrator rights and a non-expiring password.
The dedicated ThinfinityUI user account can be created locally on the server, or be an Active Directory domain account user.
Important:
When you use 'Share Windows session', the windows session is already started so there is minimal initial delay.
But if you have too many users and all the processes run in the same session, there comes a point where the performance decreases.
If you have many simultaneous web users, choose the other option "One browser per windows session".
With this option there will be an initial connection delay (up to 30sec).
This delay is what it takes for Windows to start the session, it is not a Thinfinity VirtualUI delay.
But each process will run in a separate session, thus maintaining performance.
Authentication Tab
In the Authentication Tab > Methods, settings as follows:
Uncheck "Windows Logon"
Check "Allow anonymous access"
Uncheck "Use standard browser authentication dialog"
Mappings & 2FA can be left blank.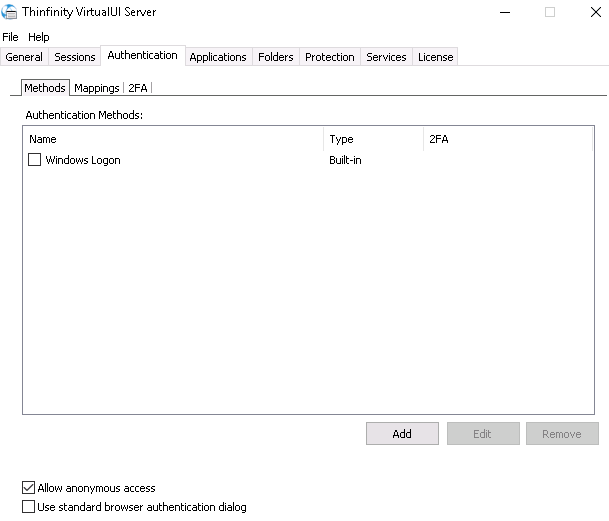
Applications Tab
Go to the Applications Tab. Ensure the settings as follows:
Uncheck or remove any existing Thinfinity applications if required
Database path = C:\ProgramData\Cybele Software\Thinfinity\VirtualUI\DB\
Click Add to configure Easy-IP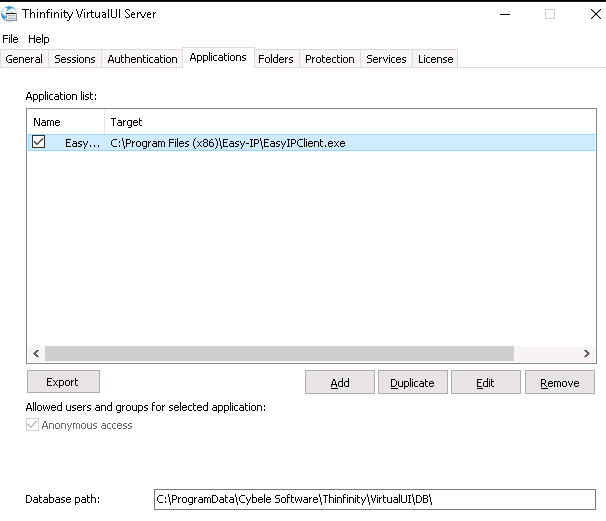
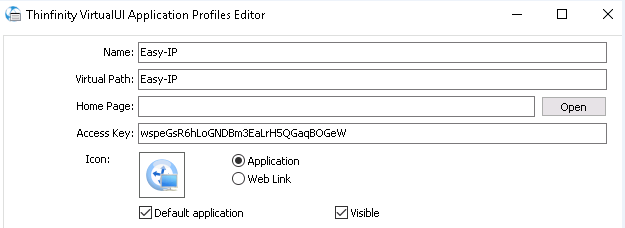
Applications Profile Editor
In the Application Profiles Editor, add Easy-IP, with the settings as follows:
Name = EasyIP
Virtual Path = EasyIP
Home Page = leave blank
Access key = Auto generated
Icon = Upload the EasyIP icon if desired
Application Radio Button = Checked
Default Application = Checked
Visible = Checked
There are 5 more Tabs under the Applications Profile Editor Tab:
General
Credentials
Permissions
Restrictions
Access Hours
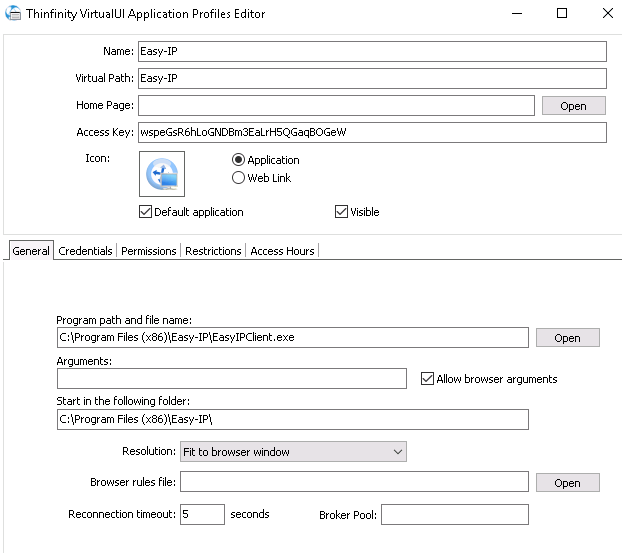
Applications Profile Editor > General
In the General Tab, settings as follows:
Program path = C:\Program Files\Easy-IP\EasyIPClient.exe
Arguments = leave blank
Start in the folder = C:\Program Files\Easy-IP\
Resolution = Fit to browser window
Browser Rules = leave blank
Reconnection Timeout = 5 seconds
Broker Pool = leave blank
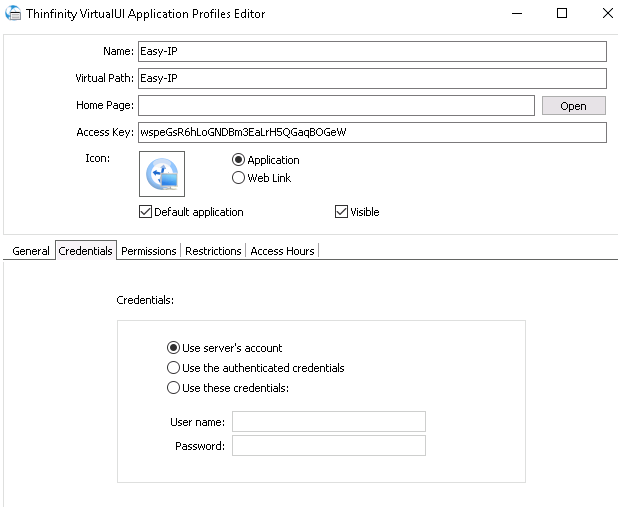
 Applications Profile Editor > Credentials
In the Credentials Tab, settings as follows:
"Use Server's account" to use the default username & password
e.g. Easy-IP-Demo\VirtualUI
or
Check "Use these credentials" radio button and enter another account.
Username = Windows username
Password = Windows password
Note
This user does not require full Windows administrator rights, but needs permission to run Thinfinity and access any folders Thinfinity requires.
We recommend using the same dedicated ThinfinityUI user account as in the Sessions tab, to avoid any permission issues.
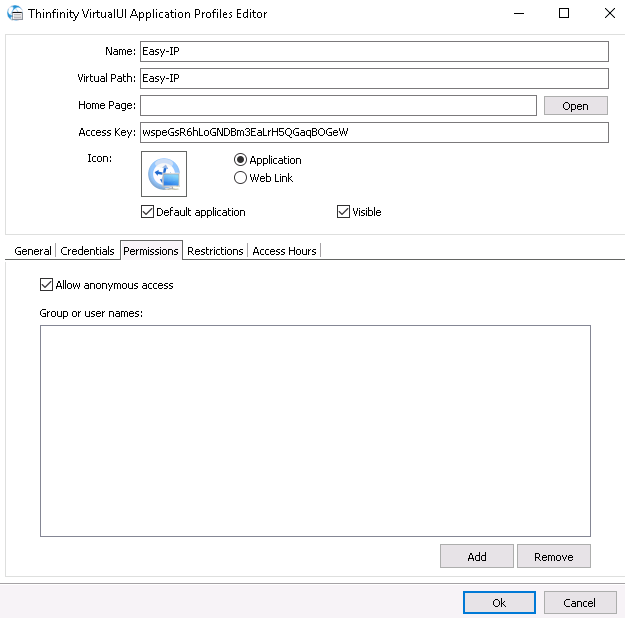
Applications Profile Editor > Permissions
In the Permissions Tab, settings as follows:
Check "Allow anonymous access"
Group or user names = leave blank
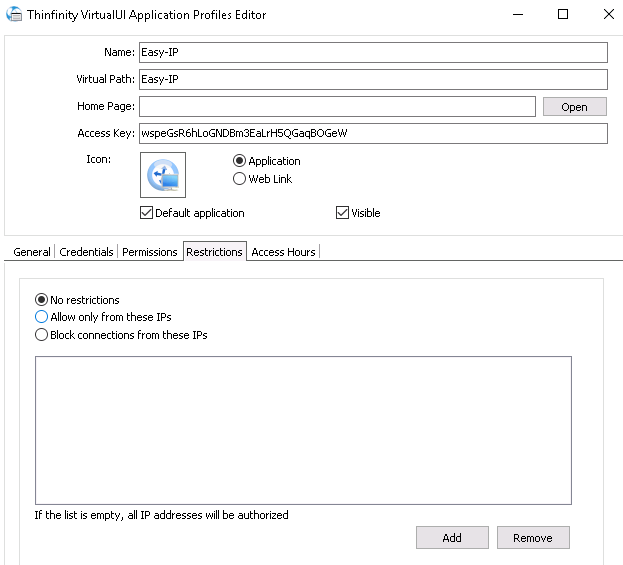
Applications Profile Editor > Restrictions
In the Restrictions Tab, settings as follows:
Check "No Restrictions"
Applications Profile Editor > Access Hours
In the Restrictions Tab, settings as follows:
Leave as default = Access all hours
or
Check desired access hours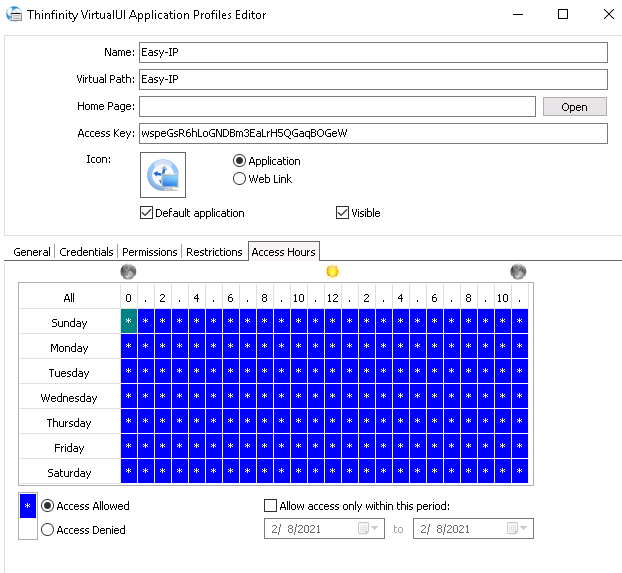
Folders Tab
In the Folders Tab, settings as follows:
Leave all the settings as the default.
Path: C:\Users\Public\Documents\Cybele Software\Thinfinity\VirtualUI
Network Credentials: Blank
Event Log: Enable Logging: Unchecked (default)
or
Check to enable the log and enter a path for the log to be stored.
Note:
Only enable log for troubleshooting.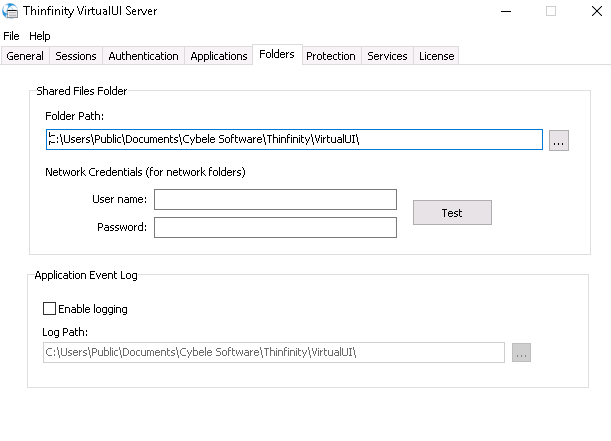
Protection Tab
Enable brute force detection: Unchecked (default)
Max login attempts: 3 (default)
Re-enable after: 10 mins (default)
White List
(default is local IP addresses)
10.154.0.2
127.0.0.1
Black List
Empty (default)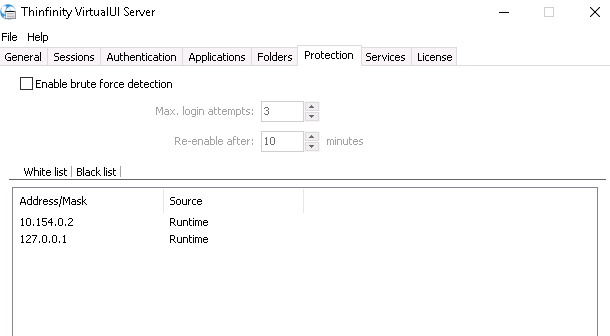
Services Tab
By default only the first 2 options are checked.
Broker Service
Gateway Service
File & Virtualisation Service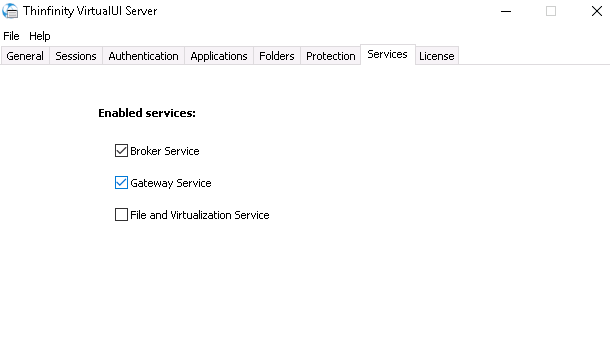
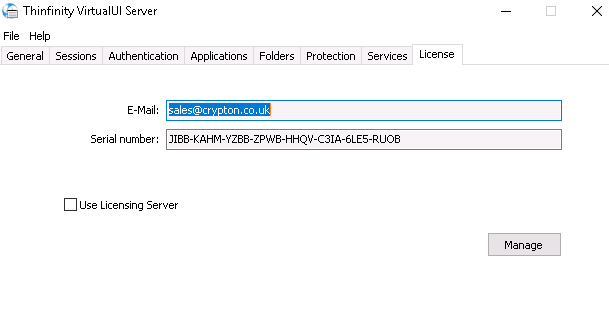
Licenses Tab
This Tab is used to register the Thinfinity License key.
Check the License is registered.
Go to License Tab.
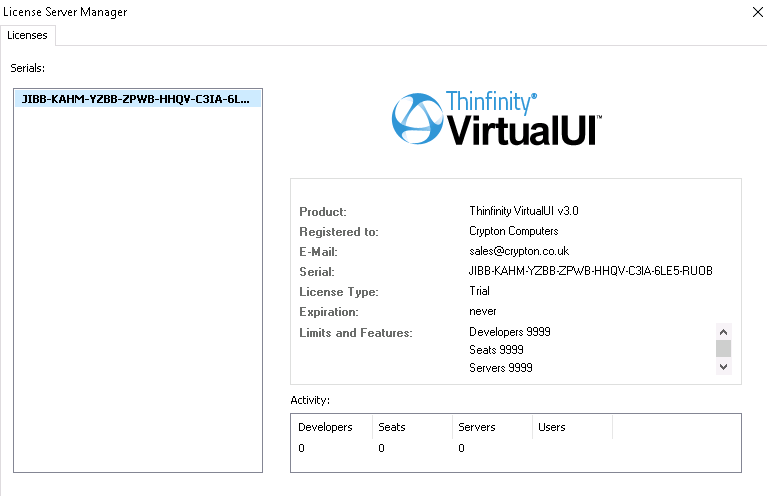
Click Manage.
 Display should be similar to that below.
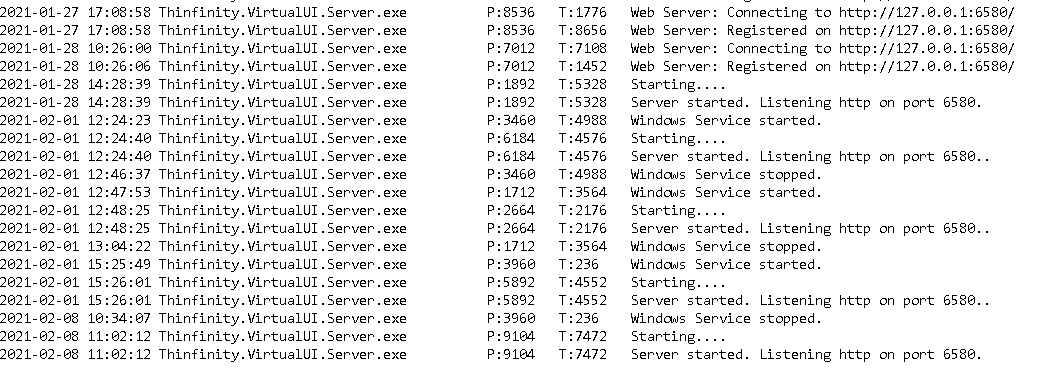
To test the Thinfinity is up & running, click Show Log.
It should say "Server Started. Listening http on port 6580"